Tuning and Testing Antennas with the NanoVNA: A Starter’s Guide
The NanoVNA is a powerful yet affordable tool for testing and tuning antennas. This beginner-friendly guide walks you through setup, calibration, and how to check SWR so you can get the most out of your station.
9/1/20252 min read

How to Use a NanoVNA for Beginners
If you’ve recently picked up a NanoVNA and aren’t sure where to start, this guide will walk you through the basics. The NanoVNA is a small but powerful tool that helps you understand how your antennas, coax, and RF components are really performing.
What is a NanoVNA?
A NanoVNA is a handheld vector network analyzer. That sounds technical, but in simple terms it measures how well your antenna or RF system is matched to your radio. It shows you the SWR, return loss, and other key information across a frequency range so you can tune and troubleshoot effectively.
What You’ll Need
NanoVNA (any version such as V2, H, or H4)
Calibration kit (open, short, and load – usually included)
SMA adapters for your coax and antennas
Optional: USB cable and PC software (NanoVNA Saver) for easier viewing
Step 1: Power On and Set Frequency
Turn on the NanoVNA.
Open the Menu > Stimulus section.
Set the Start and Stop frequencies for the band you want to test.
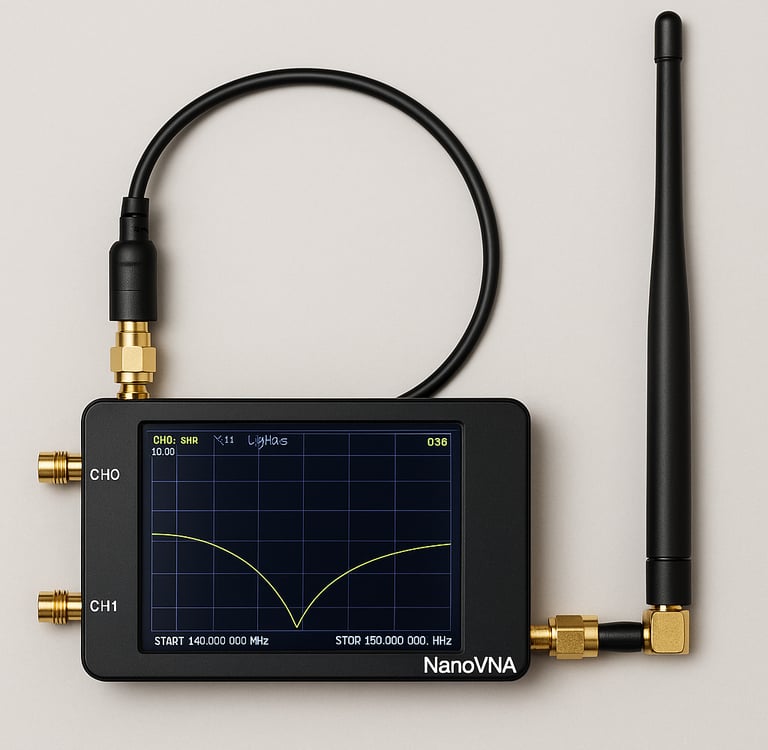
Example: for the 2-meter band, use Start = 140 MHz and Stop = 150 MHz.
Step 2: Calibrate the NanoVNA
Calibration ensures accurate results in your chosen frequency range.
Disconnect everything.
Go to Menu > Calibration > Reset.
Select Calibrate and follow the prompts:
Connect the Open standard.
Connect the Short standard.
Connect the Load standard.
For two-port testing, connect CH0 to CH1 with a short cable (not needed for antenna SWR checks).
Save the calibration in a memory slot.
Step 3: Connect Your Antenna
Attach your antenna (or feed line) to Port 0 (CH0).
Select the SWR or LogMag trace on the screen.
Look for a dip in SWR near your desired frequency.
SWR under 2:1 is usable.
SWR near 1.5:1 or below is excellent.
Step 4: Read the Display
SWR trace: Quick look at match quality.
Return loss (LogMag): Measures reflected power.
Markers: Place one on your operating frequency to see exact values.
Smith Chart: Advanced, useful later for impedance matching.
Practical Uses for Beginners
Checking if an antenna is resonant in the correct band.
Tuning antennas by trimming length until resonance falls inside the band.
Verifying coax cables for faults or damage.
Testing SWR across multiple bands before heading out for POTA or SOTA.
Tips for Success
Always calibrate in the frequency range you’re testing.
Keep SMA adapters tight to avoid bad readings.
Use PC software for larger graphs and saving results.
Charge the NanoVNA before taking it into the field.
Example: Checking a 2-Meter Antenna
Set Start = 140 MHz, Stop = 150 MHz.
Calibrate using open/short/load.
Connect antenna to CH0.
Look for SWR dip around 146 MHz.
If resonance is too low, shorten the antenna.
If resonance is too high, lengthen the antenna.
Wrapping Up
The NanoVNA is one of the most useful and affordable tools you can add to your ham shack. With just a little practice, you’ll be able to measure, tune, and troubleshoot antennas and feed lines like a pro.